Saturday, December 26, 2009

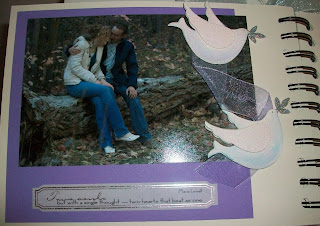
Custom Photo Guest Book

My custom scrapbook style guest books are unique and can be enjoyed even after that blissful wedding day!! Each page offers a blank area for guests to include a congratulatory message in the autograph style book. With the featured pictures, this guest book will be perfect for displaying on the coffee table for guests to view and read!

I created this autograph style guest book for my little sister's wedding. I included some sample photos of her pages.


This guest book is also a scrapbook, so any fun quotes, stories, or lists can be added!


This beautiful book is much more than a guest sign-in book. It will be a true keepsake that you will want to look back on and treasure for a lifetime!

Tuesday, December 22, 2009

INTRODUCING VISITING TEACHING KITS!!

Happy New Year!! I am so excited for this time of year when we make New Year's Resolutions and begin the year with a fresh start! Let's make this year a great one for visiting teaching!!

This adorable visiting teaching handout is the perfect ice-breaker and your sisters are sure to love having something physical to remember your sweet visit!!

This kit contains the complete January 2010 LDS Visiting Teaching Message on colorful tags (front & back)! A January calendar bookmark and yummy oatmeal chocolate chip cookie recipe is also included.


To kick start this year's visiting teaching, you may purchase these adorable kits at:

These packets will be available each month. If you would like to pre-order for future kits, please e-mail me for discounts and information!! justbeccuz@gmail.com

Curling Ribbon: A How To Guide!

My two toddlers wanted to have some kid-friendly gift tags to attach to their friend's Christmas presents this year! These Disney tags have proven to be the perfect addition to any gift, present, treat, or card!

This step by step guide will show you how to curl some fun ribbon. This adds the perfect touch to either tags or gifts!
What you need:
Scrapbooking tool kit (you could even use pliers or tweezers), metallic ribbon
Begin your project by securely tying of fastening your ribbon to the tag.

Take your pliers and pinch the end of the ribbon.

Curl one side of the ribbon until it completely encircles the pliers.

Slowly pull the pliers away from the tag, until the ribbon unwinds to your liking. If you pull it tightly, the curls will be elongated, if you would like larger curls, pull very slightly.

Repeat steps on the other side of ribbon and VOILA!! You have the cutest finished project!!